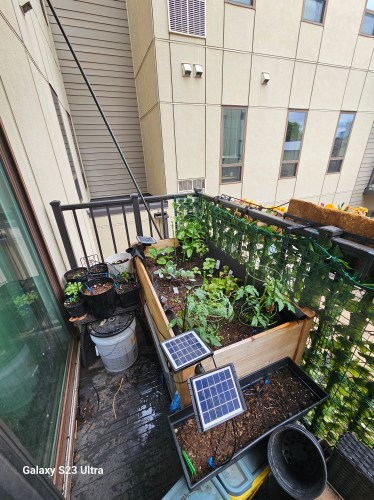
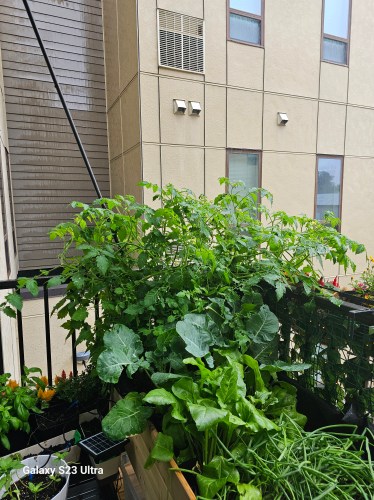
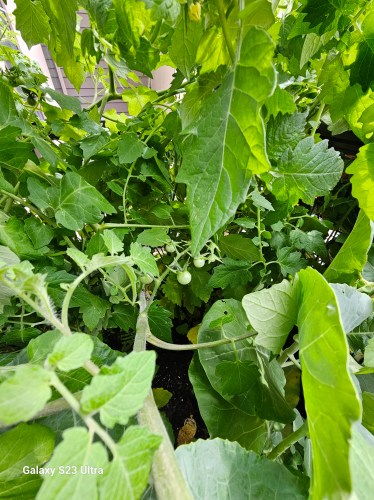
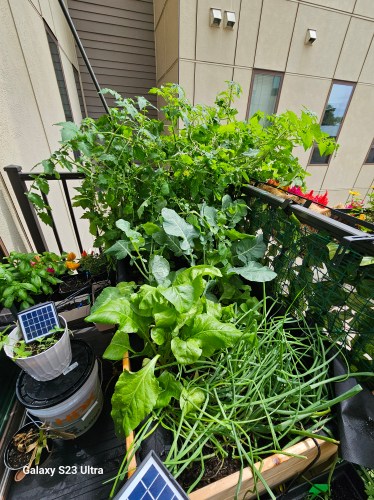
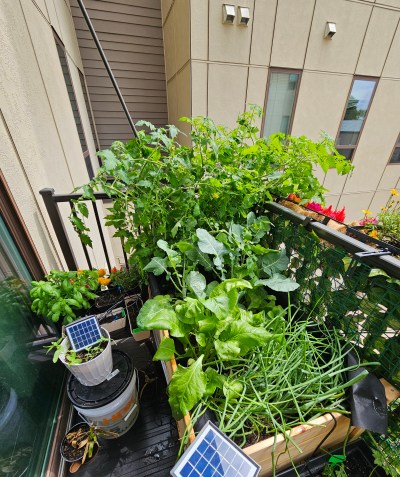
My original plans for the balcony garden didn’t quite go as expected, but I’m still excited to watch it grow and evolve. Here’s my current garden layout:
Peppers
Wonderberry Sunberry
Swiss Chard
Large Tomato
Eggplant
Redbull Brussel Sprouts
Mexican Sour Gherkin
Large Tomato
I don’t have a plan for every plant just yet, but I’m especially on the lookout for Swiss Chard recipes—it’s new to me, and I’m curious to try it!
One update from last year: I’ve added a third solar-powered watering system. This one is dedicated to the flowers and herbs on the left side of the table, which should help everything thrive with a little less effort on my part.
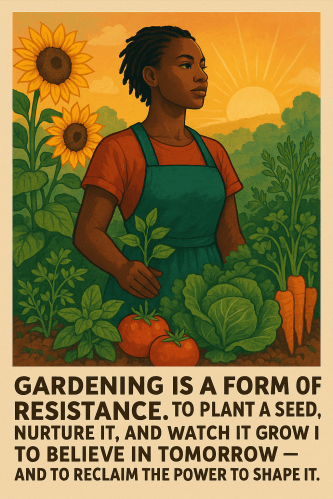
Gardening is a form of resistance. To plant a seed, nurture it, and watch it grow is to believe in tomorrow—and to reclaim the power to shape it.
When I started my garden last year, I wasn’t sure how successful it would be. Little did I know I had a natural talent, and that if I listened to nature, I would do well.
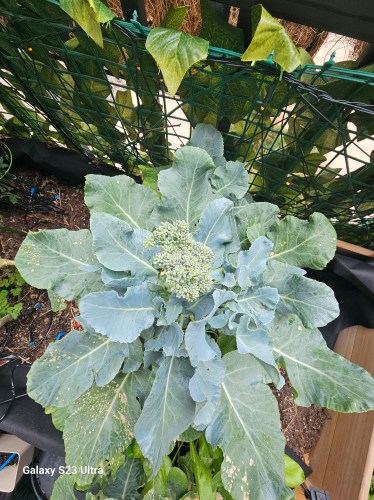
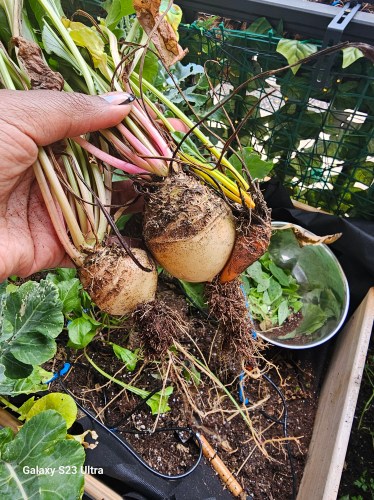
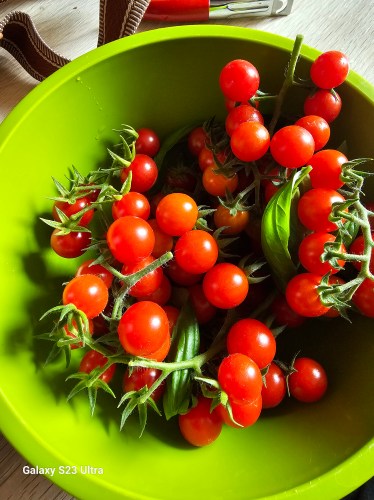
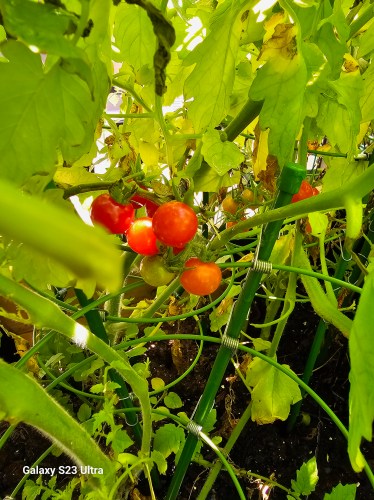
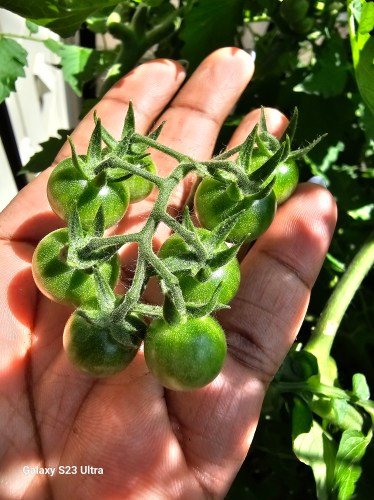
Last year I grew cherry tomatoes, broccoli, green onions and beets. I was surprised about how much I yielded and I want to share with you all what worked well.
Gardening 101
Figure out what you want to grow, for me I started with things I knew I would eat. I wasn’t sure if I would be successful, so I probably went a little overboard with the plants I started with.
After you have your list, figure out where and how you want to grow it. Almost all seeds have information listed about how much space is needed on the package. Here are a few things to consider:
Pick a growing location that fits the needs of the plants you are growing. Things to take note of:
Container size
Container drainage
Access to sun
Hydration needs
Time of year: When you plant matters, this can help you decide whether to plant seeds or to buy plants that have already started to bloom from a hardware store or local plant store. What to consider:
What is the total time that it takes from planting to harvest?
Dirt: Once you figure all of this out, you should pick a way to fertilize your garden and your soil. Here is what I did
I bought a compost and manure mix with a soil made specifically for raised garden beds.
I got a massive bag of worm castings from Costco and I mixed all of it together before I started planting.
They boost plant growth, improve soil structure, enhance water retention, and promote a healthier soil ecosystem.
Water: Figure out how you are going to keep up a consistent watering system.
Honestly, this was the hardest step for me, but once I figured it out it made life so much easier. I got a automatic solar powered watering system for my entire garden.
Harvest: The first time I harvested I was surprised at how much I was able to grow. It was overwhelming and I didn’t have a plan to do with any of the excess.
I made the mistake of planting 4 tomato plants and I was harvesting at least 1 pound of tomatoes a day. Which I was able to freeze and I ate fresh tomatoes all summer.
Celebrate
Here are a few pictures from my garden LY. This year, my goal is to be more strategic about what I grow, to get the most of my harvest.
One thing I learned is that not all plants play nicely next to each other. That said, I found a great resource to help me with my planning. This year I am planting a stir fry garden. This will be a 4×4 sectioning of my raised garden bed with each section dedicated to a veggie.
Potlucks are the perfect way to unite people over a shared love of food. Whether hosting or attending, having a standout dish can make all the difference. Today, I’m sharing two of my most well-received potluck recipes that always leave plates empty and taste buds happy: Sweet Potato Cookies and Smoky Cajun Mac and Cheese. These recipes strike the perfect balance between comfort and creativity, making them ideal for any gathering. Let’s dive into the details so you can wow your friends and family at your next potluck!
1 pound uncooked elbow macaroni
6 tablespoons butter
3 garlic cloves, minced
1/4 cup all-purpose flour
3 cups cashew milk
1-1/2 cups shredded sharp cheddar cheese
1 cup shredded Smoked Cheddar
1/2 cup shredded Gouda cheese
2 teaspoons Cajun seasoning (Louisiana Fish Fry Products Brand)
2 teaspoons liquid smoke
1 tablespoon Old Bay
1 tablespoon Garlic Salt
1 teaspoon salt
1/2 teaspoon pepper
Preheat oven to 400°. Cook macaroni until it is al dente or just barely done. Drain; set aside.
In a large Dutch oven, melt butter over medium heat. Add garlic and cook until browned. Add in flour, Cashew Milk, liquid smoke, old bay, garlic salt, and Cajun seasoning. Cook for 4-5 minutes
In the same pan gradually add shredded cheeses, stirring continuously until the cheese is melted.
Add in macaroni, coat all of the noodles well with the cheese mixture.
Place the Dutch Oven in the oven and bake until cheese is bubbly and edges are golden brown, 20-25 minutes.
Sweet Potato Snickerdoodles
PREP TIME: 40 minutes
COOK TIME: 10 minutes to 12 minutes
Ingredients
2 sticks (1 cup) unsalted butter
1/4 cup coconut oil
1 1/4 cup sweet potatoes (about 3 large sweet potatoes)
1 1/2 cups granulated sugar, divided
3/4 cup packed dark brown sugar
1 tablespoon vanilla extract
1 large egg yolk
3 1/4 cups all-purpose flour
1 teaspoon cream of tartar
1 teaspoon baking soda
3/4 teaspoon kosher salt
1/2 teaspoon baking powder
1 tablespoon ground cinnamon
1 teaspoon five spice
1 tablespoon ginger
Instructions
Peel skin from sweet potatoes and cook for 25 minutes until soft. Mix sweet potatoes with a hand mixer until all the lumps are gone.
Cut 2 sticks (1 cup) unsalted butter into 1/2-inch cubes and melt in a small saucepan over medium heat. Continue cooking, stirring constantly while scraping the bottom of the pot with a rubber spatula to release any browned bits, until the butter is light brown, smells nutty, and no longer foamy, 3 to 4 minutes.
Immediately scrape into a large heatproof bowl. Add 1/4 cup vegetable shortening and stir to combine. Let cool at room temperature for 10 minutes. Meanwhile, cool the sweet potatoes and place them in a medium bowl.
Add 1 cup of the granulated sugar, 3/4 cup packed dark brown sugar, 1 tablespoon vanilla extract, and 1 large egg yolk to the bowl of melted butter. Whisk until completely smooth and glossy. Add the mashed sweet potato (reserve the bowl) and whisk until incorporated.
Add 3 1/4 cups all-purpose flour, 1 teaspoon cream of tartar, 1 teaspoon baking soda, 3/4 teaspoon kosher salt, and 1/2 teaspoon baking powder. Stir with a rubber spatula or wooden spoon until the flour is completely incorporated. Cover the bowl with plastic wrap and refrigerate for 15 minutes. Meanwhile, divide the oven into thirds with 2 racks and heat the oven to 350°F. Line 2 baking sheets with parchment paper.
Wipe out the sweet potato bowl bowl. Add the remaining 1/2 cup granulated sugar and 1 tablespoon ground cinnamon to the bowl and stir to combine. Scoop out the dough with a 1 1/2-inch wide cookie scoop or into 24 (about 2 rounded tablespoon) portions, and roll into balls. Roll each ball completely in the cinnamon sugar and place at least 2 inches apart on the prepared baking sheets.
Sprinkle with more cinnamon sugar. Gently flatten each dough ball with the bottom of a drinking glass until about 1/2 inch thick. Bake until lightly browned and the tops crack slightly, 10 to 12 minutes. Let cool slightly on the baking sheets for 5 minutes, then transfer onto a wire rack to cool completely.
Note: You may need to add more flour if the sweet potato ratio is off.
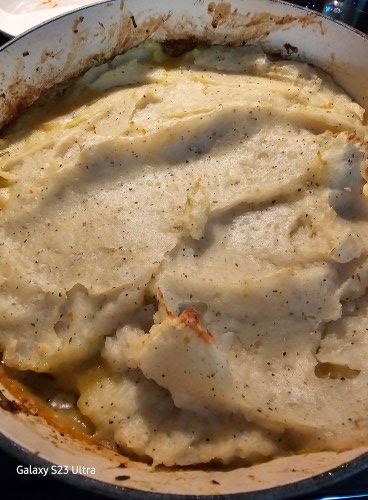
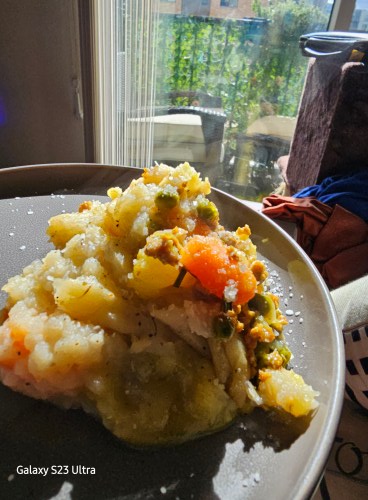
I was walking a last weekend, and the entire time I was wondering about what I could make to stop this bone deep chill I was feeling. I took a moment to google, “Is it hard to make Shepard’s pie?” Short answer no, it isn’t. Here is my rendition of this hearty fall favorite.
The Origin StoryHousewives were left trying to make use of every bit of food they had. Nothing could go to waste when you weren’t sure when you’d have fresh food again. Shepherd’s pie was a creative way for families to combine leftovers from other meals to make a new dish that’s extremely filling.
Ingredients List
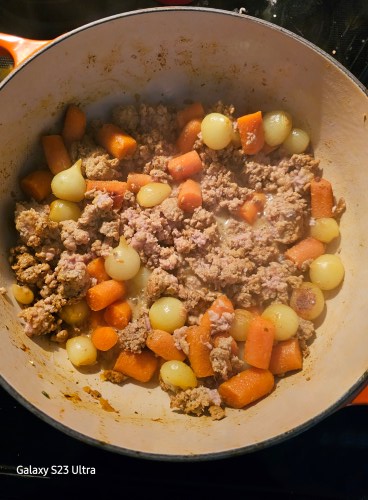
1lb Ground Turkey
1c Chopped Carrots
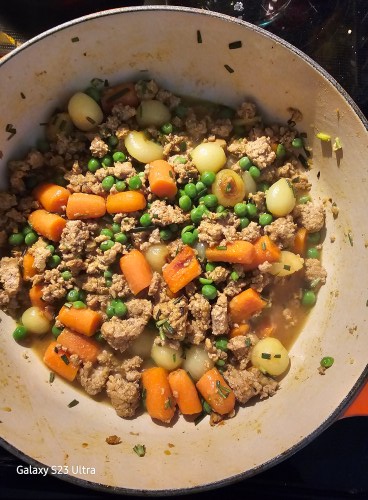
1c Frozen Peas
1c Frozen White Pearl Onions (I used fresh ones and it took forever for me to peel them.)
1c Bone Broth Chicken
1tbsp of Flour
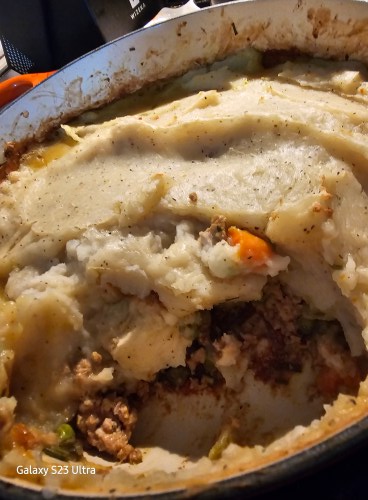
3 large potatoes mashed w/butter and garlic
1/3c Fresh Rosemary
Seasonings: 21 Seasoning Salute from Trader Joes, Garlic, Sea Salt, Pepper, Butter, and Onion Powder
Instructions
Boil the potatoes:
Place the peeled and quartered potatoes in medium sized pot. Cover with at least an inch of cold water. Add a teaspoon of salt, pepper and 21 Seasoning Salute. Bring to a boil, reduce to a simmer, and cook until tender (about 20 minutes).
Preheat the oven to 400°F.
Sauté the vegetables: While cooking the potatoes sauté your carrots and onion’s until soft. ~5m
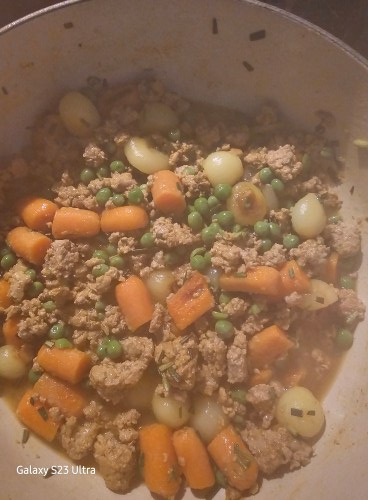
Add in Peas, Rosemary, and Ground Turkey, cook until brown.
Add in Broth, 21 seasoning salute, and flour
Mash the cooked potatoes with butter, sea salt, pepper, and 21 seasoning salute
Add in mashed potatoes on top of the veggies and meat,
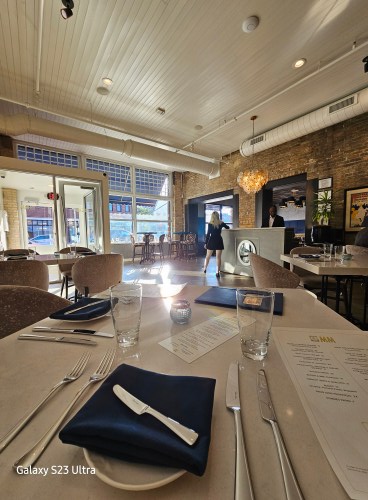
I needed to make up a birthday dinner with a friend, and decided that I should kill two birds with one stone. I adore Chef Fhima and I love his restaurant Fhima’s, so I knew that I would love this place too. I have to say, one of the best things about a Chef Fhima restaurant is that you know that each person you meet there will be the kindest person you meet that night. They take service to another level. Their wait staff is well informed, and encouraging they take time to get to know you a little, which was amazing. I mentioned that I was lactose intolerant so I try not to eat anything with too much dairy and it was such a nice gesture to suggest an appetizer that didn’t have dairy. It may seem inconsequential but it meant a lot to me.
Maison Margaux is a French restaurant located in the North Loop neighborhood of Minneapolis. Chef Fhima pairs his love for food with his love for philanthropy and service. I have personally seen him volunteer, support charity, and give back to the community. You can read their mission statement here.
So, now to the food. The food was immaculate, it was perfection, it tasted like the best thing I have put in my mouth in years. Everything I had was 10/10. I didn’t take pictures because I was starving and I didn’t want to ruin the experience by focusing on getting a good pic. You’ll have to check it out yourself!
For our starter we had the Tomato & Onion Piperade with Seared Tuna. This was a great starter, the bread was slightly crispy and soft which made for a nice combination for the starter. Along with our starter I also got a drink. The drink tasted like Summer it was called La Vie En Rose it had Vodka, Quinquina Aperitif, Damson Plum Liqueur, Liqueur de Violettes, Plum-Wildflower Honey Shrub, Grapefruit.
For my main I got the Grand “Wagyu” Steak Au Poivre with Pommes Frites. This steak was so delicious, perfectly cooked with a nice sear on the edges. I love the fries on the side, unfortunately I was so stuffed that I couldn’t finish either. I let my friend finish the rest.